Wednesday, December 30, 2020

Another Bread Fail?

 ...Or at least call it a less-than-optimal rise.  I baked another 100% whole wheat loaf, this time with Red Fife wheat, which is (so far) my favorite.  Here's the result:


It's not exactly a failed loaf; it's just more dense than normal. The comparison loaf is 100% white flour, which is always very fluffy. The rare 100% whole wheat splitting top crust was nowhere to be seen.  Still, I have had worse experiences.

 I think in this case the flour may have been slightly too hydrated, and the stones of my grinder may have snuck apart on me and may need adjustment again.  That was a main factor behind the epic Emmer disaster. The other factor was over-hydration, and the two may go together.  Under-ground wheat = less water needed for making the sponge.  If one does not adjust for that, it's a soggy, grainy mess that doesn't rise.  I'll try again, but will go back to 50% for a while in the meantime.


Saturday, December 19, 2020

Apricot Sludge

 The title may not be very appetizing.  However, it's a reasonable way to characterize what I found when I recently opened a jar of apricots that were canned a few years ago. Would 'Viscous Apricot Syrup' be any better?

I've written before about canning apricots.  It's a pretty straightforward process.  And I have written before about the storage life of canned food.  It's more than a year.


These apricots were canned in the summer of 2016, so were about four years old when opened.  As you can see, they're a little darker than when fresh, but the flavor was fine.  What may or may not be easy to see is that the syrup has turned into more of a gel:


I assume this is the action of the pectin, present at varying levels in many or most fruits.  There are no problems with quality, either of the syrup or of the fruit itself.  I don't know how long canned fruit is good for, but it seems to stretch at least four years.  As I've noted before, as well, I've opened four-year-old jars of peach preserves, too, and found them to be fine.  One exception is some sugar-free peach preserves I made with Whey Low one time; I didn't write about the effort at the time, but I followed my normal process, except substituting Whey Low for sugar.  The Whey Low, after about three years, had granulated, making the preserves somewhat disturbingly crunchy (although the flavor was okay).

I haven't seen this same gelling process with pears, which have more pectin, but I don't have any that have been canned for as long as the apricots.  The same thing may happen with them, as well, if they are on the shelf for a couple more years.


Saturday, December 12, 2020

Patching Clothes, Three Years Later

 Almost three years ago I wrote about a pair of jeans that had a tear in the knee that I fixed.  Here's how the patch looks now:


As you can see, it's still holding up pretty well, despite some additional fuzziness as the surrounding areas fray a bit because they weren't completely stitched down.  The jeans accumulated another small tear this last summer, which was easily secured without a patch:


Other than that, they're still going strong.  They get worn and washed almost weekly, so they have about 150 additional washings at this point.  If a garment is too badly worn or torn, it might not be worth saving.  However, an evaluation is called for--being able to keep things in service longer is well worth the relatively small amount of effort it takes (sometimes).


Monday, November 23, 2020

Fall Color Variations

 Here are just a couple of fall pictures.  The autumn color here hasn't been that good this year; a lot of leaves were blown down by storms and the trees are turning late.  The hickories and red maples in the woods are pretty nice, but the poplars were largely barren already.

I think both of these are sassafras seedlings.  The first one is what I have assumed to be the more typical color, yellow:


Nearby, on the other side of the driveway is this:


Doing a Google image search reveals that orange sassafras is common, but most of what I have seen has been yellow...or maybe that's just what I have looked for (see, for another example, the first picture in this post).  More interesting is that I don't see any adult sassafras trees around, but these are within about 20 feet of each other and may have originated from the same parent.

Otherwise, this fall in Georgia has been pretty disappointing.  Many leaves dropped while green.  Now in late November, many trees are bare, while others are just turning.  Some oaks are still mostly green.  It has been odd.


Friday, November 13, 2020

Building the Chicken Tractor, Random Notes

 In no particular order:

A ripped 2x2 (i.e., a 2x4 cut in half lengthwise) is going to be 1.75" x 1.5".   If the side vertical supports are not positioned so that the widths match (i.e., the 2x2 has to be turned so that it is aligned with the base and top frame) then attaching the diagonal braces may be difficult. If this is remembered only after the vertical supports are all in place, shims may be needed in places.

I did build another one for a second brood.  I incorporated several design modifications, some of which worked well.  One that I think will be a big improvement is diagonal bracing in the corners of the top. Shown below is the top laid on top of the tractor before the addition of the side and roof panels.


I added metal angle braces to the top corners of the first tractor, but they weren't very effective in fixing the movement.

Also somewhat visible in the picture above is the framework for the lowered nest boxes.  I used an additional horizontal bar to anchor the top of the vertical supports around the next boxes, but in retrospect, I could have just made the verticals longer to reach the top bar.  That certainly would have been easier. However, the added horizontal support provides an anchor point for the roofing panel material that needs to be added above the boxes...otherwise, it'd just be sharp metal.  It would probably not injure the chickens but might injure me when pulling the boxes out.

Because the nest boxes are lower, there is more of a gap at the top.  To prevent chickens from jumping in when I have the boxes closed off from access (as I will this time until they are about ready to start laying), I put in side and front curtains to limit the space to about what it would have been if the boxes had been as high as called for in the plans.


Here's a view from the front: I don't think it's as crooked as it looks in the picture; it's just due to the angle of the shot (though the perch is definitely crooked--by design).


I also made the tractor bidirectional by adding holes to the front wheel blocks for wheels if needed.  Instead of metal eye hooks, I just threaded the rope through them for pulling.  I expect to seldom switch the wheels, but it would be nice to have the ability if needed.  It's much easier to pull the tractor than push it.  Wheels at each end, though, probably would not work very well.  The five inch lawnmower wheels provide very little ground clearance.  On rough ground the back sill plate scrapes.  Trying to roll on four wheels wouldn't help that and would actually make it worse.
 
Those are the primary additional design changes, along with using galvanized or stainless hardware throughout (not for the screws; those are standard coated torx-head deck screws, but for the hinges and hasps).
 
Update:  This hasn't been as successful as hoped: See this post.


Friday, October 23, 2020

More on Old Beans

 A few years ago I discussed ways to deal with old pinto beans (and other dry beans).  I mentioned that pressure cooking them for 15 minutes seemed to work (the manual for my cooker suggests 3-6 minutes for pinto beans, so 15 is a substantial increase in cooking time).  I had some more very old beans (vintage 2011, not stored in an oxygen-free environment) in the pantry that I decided to try to prepare.


A new pinto bean is at the top for comparison.  When I soaked the beans overnight, they did swell substantially, so that was a good sign.  I poured off the water and pressure cooked them together with granulated garlic, dried minced onion, and some salt pork (rather than bacon, of which I did not have any thawed).  This was the result:


They're still quite dark, and hadn't absorbed as much of the cooking water as anticipated (compare to the results from a previous effort):


This time, the beans were also a bit al dente. Longer cooking time may have helped.  Possibly 20 minutes?  Aside from the firmness, they tasted fine.  The nutritional content might have been lacking in some categories.

I don't really have much information on beans stored in a light- and oxygen-free container.  They are probably better.  Cyrus Larson, et al. at  BYU tested vacuum-packed dry beans aged up to 32 years and found that they were at least edible.


Monday, October 19, 2020

Black Walnut Harvest

 It's black walnut time.  I haven't improved my process much over what I have discussed before.  It's still a multi-step, somewhat slow process. I have gotten faster: a full 5-gallon bucket can be processed in 30-40 minutes.


The first step is to gather them; shown above are some walnuts that had been on the ground no more than about four days.  They soon start to turn black, as noted previously; the hull rapidly breaks down.  That's what it's designed to do.  The hull contains a hefty dose of juglone to suppress nearby vegetation, thus giving the nut the best chance to sprout and grow.


When the hull is black and soft, it can still be removed, though it gets a little more difficult.  If it dries down around the nut, as sometimes happens, it's extremely hard to remove, as discussed before.


Hammering the hulls off is messy and slow.  I'm still nowhere as fast as Rbeckism.  He spent about 5 seconds per walnut; I average a more (maybe 10 seconds), although speed is improving.


Once the majority of the hulls are knocked off:


I swirl them in water a few times to get them something approaching clean.


I'm not going for works of art; these are clean enough.  I've noticed over the years that walnuts are vulnerable to mold when the unhulled nuts are stored in buckets and when they are wet (as in the picture above) after hulling.  They need to be dried relatively quickly, and will retain moisture for a time. Shown above are nuts immediately after washing; below are several boxes of nuts, with the middle three boxes nearly dry.


One caveat, as noted previously:  the hulls stain.  If there are no husk flies, the juice from the hulls is a dark yellow, but it causes dark brown stains.  The left glove above is the one that holds the hulls while I knock them off with the hammer; it's badly stained.  Somewhere along the way, I got a small leak in my left glove, which led to my hand getting some stain on it.


This isn't entirely surprising.  The ridges on the nuts are very sharp.  One probably nicked a little hole in one of the fingers, even though the gloves are very thick.

 I'm still in the midst of the harvest.  In mid-October, my tree is at peak nut drop (curiously, the other tree didn't produce any nuts this year--which is fine...the one that has a bumper crop is the best tree for nut quality).

 To some degree, hulling is the easy part.  Next comes cracking...


Monday, October 12, 2020

Building the Chicken Tractor, Part III

In addition to the modifications described in the first two installments, I made some other changes to the original design.  One is that I added a couple of cross-braces at the top.  These increase the strength of the frame somewhat and also provide places to hang small feeders or waterers if desired.  For a while, I had a three-pound feeder hanging from one of the crossbars.

For reasons I haven't figured out, I have a lot of movement of the top in relation to the frame--this is noticeable with the latching hasp in the middle of the tractor body.  Sometimes it doesn't line up.  It can shift to either side.  I put some corner braces inside the top hoping it would help, but it largely hasn't (shown below behind the late black widow, which was discussed in an earlier post).


One very important modification addresses one of the structural vulnerabilities in the design.

Shown below is the back of the tractor.  The milk crates serve as nest boxes (you'll also note that the hasp is reversed from the plans; I think the original plan is better but I just assembled it wrong).


The milk crates themselves are part of the back wall.  The openings at the bottom of the crate are bigger than with the half-inch hardware cloth, but not too bad.  The holes for the handholds on the crates, however, are pretty big.  I was aware that this was a potential problem at the time I was building the tractor, but thought it probably wouldn't be a problem, because the chickens would be roosting on the bars at the front of the tractor.


As it turns out, the chickens do like to roost back there.  As the picture above shows, the nest boxes are at the top of the frame--this simplifies construction because they're right up against the top bar of the frame, but also puts them relatively high in the tractor. I think the next time I make one of these I'm going to lower the nest boxes down a little bit.  That will complicate the design but may make them less attractive.  There is a flip-up perch in front of the nest boxes that is intended to be used to block the nest boxes if the chickens start roosting in there, but my chickens just flipped it back down when I tried to block the nest boxes.  Also, depending on ones' schedule, that might not be viable.  If you leave for work early in the day (before the chickens are moving around), it's not feasible to flip the bar up in the evening and down in the morning before they start laying.

So the chickens who roosted in the nest boxes essentially are within reach of the handholds.  And eventually, I did lose some birds that way (two in one  night).


It was a fox that got them (the above picture is not from the night of the attack, but does indicate that there are predators in the vicinity).

Mitigation is pretty simple (I think).  I simply attached some hardware cloth to the board that serves as the gate holding the nest boxes in.
For now, the hardware cloth is overly large.  To actually open the gate and pull the boxes out, some of the hardware cloth on the left edge of the picture will have to be trimmed.  However, the cutaway around the hasp should allow this to open and close.  The two pieces of firewood at the bottom hold it in place, but may not even be necessary.  This should solve the nest box vulnerability (this was done the day after the attack, by the way, which is why blood is still visible on the back of the tractor).
It would also be pretty easy to just service the tractor from the top, collecting eggs that way.  My chickens aren't laying yet and I don't know if they will even lay in the milk crates. Time will tell.

 One other thing I've done that isn't really a modification of the tractor: As seen in the picture at the top, I cut a 6x8 white tarp to drape over the top.  This is so that the sun isn't hitting the galvanized metal directly.  I don't know if it helps keep the tractor any cooler when the sun hits it, but the chickens seem to be doing okay.


Monday, October 5, 2020

Building the Chicken Tractor, Part II


As noted previously, having someone available to help attach the top with its hinges is very useful.


Even with the help, it took me a couple of tries to get the top on straight.  The frame for the top is built first and attached; then the roofing panels follow almost at the end.  The plans have 65 steps; some of which can be done out of order, but some of which need to be sequential.  It is very helpful to not have the roofing panels on until most other hardware is attached.

As I mentioned in the previous installment, I put roofing panels along the entire top of the tractor, rather than leave two feet of hardware cloth.  This simplified the cutting process; I simply attached one whole panel and cut a few inches off the edge of another one.


Cutting the panels is very doable, but I was also happy to minimize the amount of cutting needed.  The picture above shows that I stapled the hardware cloth onto the frame: the plans suggest using poultry staples, which will attach more firmly, but they are also a lot harder to bang in.  A lot of hammering on the frame would seem to be pretty hard on it.  So I used staples. Half-inch stainless steel staples (like these) should hold reasonably well.  It is also possible to use more of these than could be done with poultry staples, so the net effect should be fine.

The picture above also shows the blocks I attached for the eye bolts and wheels.  I used galvanized bolts in each block, plus some additional deck screws.  I drilled the holes for the bolts, cut but did not attach the galvanized panels at the back, then measured to see where insets needed to be cut out of the panels to allow for the bolts to pass through the frame.  Then, after cutting those out, I attached the side panels, then the blocks.  The top wasn't on at this point, making it easier to get inside to screw down the nuts.


Here's a view that shows the wheel. It's a five-inch lawnmower replacement wheel.  I sized a bolt to fit the axle hole in the wheel, and drilled a same-diameter hole in the wood block, so it'd be a tight fit with minimal wobble.  So far, it is working well.  The bolt had to be long enough to go through the block and wheel, plus allow more space for attaching the bolt.  Initially, I took the wheels off at night, but it has become apparent that it really isn't necessary.  The gap at the bottom left by having the wheels on is minimal and often not a factor (the ground clearance of this beast is minimal, too; I sometimes scalp the ground if the ground isn't completely flat).  One thing I didn't think about in advance: as shown above, the bolt on the side not showing will tend to loosen as the tractor rolls.  Therefore, on that side (the left, when standing at the wheels back by the laying boxes), the bolt should be reversed so that the nut is on the inside of the block.  I have finally gotten that done and we'll see how it goes.

More in Part III.

Saturday, September 19, 2020

Building the Chicken Tractor, Part I

As noted in the post on brooding chicks, I have them now in a small chicken tractor.  I wanted them to be mobile and on grass so that they could supplement their feed, fertilize the yard, and help me avoid having to muck out the coop.  I'm avoiding shoveling chicken manure, but the tradeoff is that they need more maintenance on a daily basis.

I used the design from Justin Rhodes at Abundant Permaculture, but I made a number of modifications (one of which is critical to address a security vulnerability and will be addressed in Part III).  The basic tractor design is roughly four feet wide, eight feet long, and two feet high.  It has a number of perches and two nest boxes made out of milk crates.  The front sides are half-inch hardware cloth mesh, and the back sides are galvanized roofing panels.  The original plan calls for six feet of the roof to be roofing panels and the other two feet to be mesh.  The original design has eye bolts for attaching a rope at either end to pull the tractor across the grass--no wheels (PVC skids on the bottom are suggested to help it move better).

My major modifications were:

1) I changed the frame base from 2x2 to 2x4, to give it increased mass (probably not needed) and increased rigidity (maybe needed, maybe not). The bigger base frame also enabled me to attach wheels (below).  I also downsized the vertical supports to 21 1/2" to keep the overall height about the same.

2) I added five-inch lawnmower wheels and extra supports for the eye bolts. This was accomplished through short 2x4 pieces attached to the outsides of the 2x4 frame at each end (this made the tractor wider than four feet at the ends, but it would still fit in a full-size pickup truck bed because the midpoint of the tractor--what would be between the wheel wells--is still four feet).  This makes the tractor one-way only; it can no longer be pulled in either direction.  If two-way movement is needed, with a little bit of additional modification it could be made to accept wheels at either end (or even both ends simultaneously). More details on this in a subsequent post.

3) I put galvanized roof panels along the entire top--no mesh at all.  This simplified the cutting process; I only made one long cut in one roofing panel to cover the entire top.  It also provides more shelter from the sun and rain.  The mesh on the front four feet of the tractor provides plenty of scenery for the birds, and they can get direct sun for part of the day if they want it.  The sun shines directly into the tractor in either the morning or afternoon, depending on which direction the tractor is facing.

The picture at the right shows the frame when it was largely complete, before adding the wheel blocks (those came last).  I also later added horizontal supports at the top (to hang a feeder from at the front and also to provide additional structural support).

If you look at the plans, you'll see that my setup is reversed in some respects--my door will be on the left in the picture; the plans call for it to be on the right...that wasn't necessarily by design--I reversed the diagonal supports that run along the sides by mistake--but I adapted as I went along.  Either way works.

You'll also note something from the picture that might not be immediately apparent at the outset when you're looking at the cut list: all of the 24" (or 21 1/2") pieces have to be more or less exactly the same length.  If they aren't, they can't firmly attach to the top and bottom of the frame.

I have problems with precision--partly because of my tools.  I can usually get within 1/8", but if I have to be exact, I'm probably not going to get it right.  So I had to shim a couple of my vertical supports before screwing them down.  Two were off by about 1/4"; I cut plugs for them and glued them in before driving the screws (one is the vertical post at the center front of the picture above).  Ditto the perches--I had to shim one.  Fortunately, with all of the cuts, I had as much leftover 2x2 small pieces as I needed for any shimming needs.

It definitely helps to have multiple people for some steps, particularly when attaching the vertical pieces to the bottom rail and when attaching the top to the frame with hinges (which is one of the last  steps).

More in Part II.


Thursday, September 3, 2020

Spiders

Apparently I have a lot of funnel-web spiders.  These are not the monsters that live in Australia and can kill people.  The ones I have are mostly tiny.  In the garage I have some bigger ones, but the spiders who make webs out in the grass are so small that they usually go unnoticed, unless the dew highights their webs.  Then it becomes apparent that there are a lot of them.


I or the dog probably blunder through several per day, and mowing must wreak wholesale destruction on them.

Speaking of spiders, I'm growing Jerusalem artichokes again this year, again in pots.  And again, as was true previously, I have lynx spiders on them...is there some affinity that lynx spiders have for Jerusalem artichokes? 


Last, I found this in the chicken tractor:


While I'm usually a live-and-let-live person, I draw the line at poisonous spiders in close proximity to the livestock. Yes, they are non-aggressive and primarily interested in insects--which you can see a few carcasses of at the lower edge of the picture--but the chickens are also prone to try to grab anything that moves.  It was also a concern that the web was just above areas I access to service the chickens; running into the web head-first is what made me notice it. So I removed her and her next-generation egg sac.

Widows are supposedly common in Georgia, but I don't see them very often.  One year at my old house I had several, which probably means a female had come in and hatched a brood.  Otherwise, I see one every couple of years.  The other poisonous species, brown recluse, has apparently only been documented in relatively few counties, mostly in the northwest part of the state.


Saturday, August 29, 2020

Harvesting the Kieffer Pears

It's not much of a harvest this year.  But one of my pear trees bloomed, and I was surprised to see that some fruit actually developed.  I've mentioned before that there was an old Kieffer tree at my new house.  The tree did produce some pears, but also had a huge poison ivy vine thoroughly embedded in it, and I cut it down.

Now I have planted two more.  They have virtues--although they aren't the first choice for fresh eating, they do can well and make nice preserves.  They also dehydrate well.  Prime time for Kieffers in north Georgia seems to be late August / early September.  I may have been jumping the gun a little bit, but I went ahead and pulled mine just after mid-August.


I haven't actually cut into them yet, so don't know if I have curculio issues--they got no Surround or other preventive treatment, and I also did not do anything for fire blight.  I had some of that on both apple and pear trees.  It was very minor on this Kieffer.  That is one of the virtues of the Kieffer pear; it is not particularly susceptible to fire blight.

I didn't get much off the tree this year. I will probably just dehydrate them...or I may re-assess and make some preserves.


Thursday, August 20, 2020

Mushrooms


I have some interesting mushrooms at the front of the driveway.  This has been a pretty soggy August (over seven inches of rain so far), and that has inspired some mushrooms to sprout.  It usually happens sometime during the summer in this general location.

The orange ones are pretty colorful.


Like most mushrooms, they don't last long, just a few days before the color fades and they release their spores.  The orange ones have been expanding in recent years.  There used to be just one spot where they popped up; now they are in a few places.  The front of the driveway is dirt, gravel, and clay, but there's a lot of pine straw, as you can see; there are several very large old pine trees there that shed liberally.  It is pretty shaded for all but a couple of hours each day, so if any area is damp, that one will be.

They first emerge looking like this:


But then soon expand. The next day, the above mushrooms looked like this.


When a rain hits, they start to dissolve away.


The above pictures are from the original area where they appeared.
 
I also have some puffballs:


And these look different...though I don't know enough about mushrooms to say:


Up closer to the house, there's this specimen:


It looks a mushroom that has mold growing on it--but all of the examples look the same, so maybe it's what this particular type looks like normally.  There is a brain mushroom, aka false morel; this isn't that. That being said, it looks like a brain to me.  It's a little longer-lasting than the red ones above.


I have zero interest in trying to determine if these are edible. For example, the orange ones might  be Russula emetica, a species that likes to hang out with pine trees, or it might not--Wikipedia notes there are "over 100 red-capped Russula species worldwide." Wiki further notes that R. emetica is toxic; it can be made edible through pickling or boiling, but consumption isn't recommended.  No worries here. Wild mushrooms are not an area I ever plan to explore.  But they're interesting nonetheless.


Saturday, August 15, 2020

Muscadines and Figs

For the first time, I'm getting some muscadines.  I've planted six vines (two had to be replanted when the first died).  They have been in the ground for almost three years now, but this will be the first year I'll get more than one or two grapes per plant.  The biggest crop this year is on my Ison vine, and it is the one that is ripening first:


It's only going to be big compared to previous years.  The Ison looks like it has a couple of pounds' worth on it.  The Late Fry has maybe one pound; some of the others have a couple of grapes as in previous years.

I've also picked some figs.  I have yet to get a single fig off of a plant installed by me--actually, I have yet to have one planted by me live very long, a story for another day--but there's an old fig tree planted by the previous owner that I'm getting some off of this year.  There were two originally, but ambrosia beetles attacked one and I took it out.  The other one has probably been producing every year, but I haven't gotten many off of it--as I'm learning, the ripe ones are quickly attacked by wasps, ants, and June bugs.

The harvest from the fig tree is likewise pretty modest--there are many more that are too high for me to reach or that have ripened and been turned into bug food--but it's nice to have some (I got more than the picture shows; that's just one days' worth).  I'm going to guess it's a Celeste fig, but that's only a guess.

I also have apples and pears pending...


Sunday, August 9, 2020

Brooding Chicks

I finally pulled the trigger on chickens.  They are available in feed stores and Tractor Supply in the spring (and sometimes other times), but the assortment is variable, changing day to day.  This spring, Tractor Supply had straight run Lavender Orpingtons one day; the next day it was Rhode Island Red pullets.  So I ordered online.

They arrived May 4.  I intended to get two males and six females, all Barred Rock.  I wanted about one male, four females going forward, and ordered extra to cover for losses.  I think I actually got Barred Rock pullets and Cuckoo Maran cockerels; two immediately looked different and had different leg banding.

One of the suspected Others is sort of at the lower edge of the group in this picture.  The males had a lot more yellow on them initially.

The overly-yellow individual also distinguished himself starting on about Day 2--it became pretty clear he was the dominant one in the group.  They all clustered under the heat plate (which worked very well; my house was cold in early May) and surged out as a group periodically to drink and eat. The yellow-ish one would lead the group out from under the plate most of the time.

As those who have raised chickens know, the cute puffball stage only lasts about a week.  They soon began adding a few feathers.


And within a couple of weeks they started to look pretty ragged.


I kept them inside for about five weeks.  After that time they were getting crowded in the stock tank and were trying to fly around, which wasn't working well: I built a screened cover for the top (much needed). Also much needed was the domed cover for the warming plate; if I hadn't had it the top would've been a bit soiled.  Actually, more than a bit.

I had also heard that brooding chicks caused a lot of dust.  For the first week, there was no problem.  Then, as the pictures show, their feet started to grow, outpacing their bodies.  They also started to scratch enthusiastically.  That kicked up dust.  It soon became epic, Dust-Bowl-like dust.

As the top picture shows, I gave them some chick grit. They may not have needed it with the starter crumbels, but they were very interested in it and ate a lot.  They soon started to try to stand in the little container and kick it out; I would find a lot in the bottom when I swapped out the shavings.

By early June they were largely feathered; it was largely warm, and they largely needed to be out in the yard.  So they went.  Despite my fears of neonatal death, all survived the first few weeks.


They're now basically full-grown; the above picture is from late July--they were about 12 weeks old.  They may still add some size but are pretty huge now.  The breed difference is apparent in the picture:  one of the males is on the left.

I have them in a mobile coop, AKA chicken tractor.  So far I haven't used them for any clearing/tilling duties, but that will be coming soon.  I didn't put my garden in this year because in the March/April time frame I was building the tractor on weekends.  It didn't take as much time as that suggests, but I needed help for some things and mostly only worked on it on Saturday afternoons.  At any rate, I'm going to let them clear, till, and fertilize my garden space for next spring.  They should enjoy that.


Sunday, August 2, 2020

Poor Judgement by a Toad

I have toads in my yard near my back door.  I actually ran over one with the truck when backing out a few months ago, but otherwise I see them frequently when walking the dog early in the morning.  After a recent heavy rain, I saw the picture below in the suddenly-full plant saucers.


Apparently the toad was ready to lay eggs and the full saucers looked like a reasonable body of water to do so in.  There really isn't any other water nearby.  However, my plant saucers are in no way viable nurseries for tadpoles.  Alas.

In the absence of any still bodies of water--I actually don't know where the nearest one is--any toads that wander into my back yard have few options for spawning.


Monday, July 13, 2020

Beginning of the Blueberry Harvest, 2020

It's blueberry time.  I've moved, and don't have the five fairly mature bushes that I used to have, but I have five new ones (one of which has not yet produced much).  I won't get 20 pounds off of them this year, but may end up with as much as 6 pounds.  I'll be doing some blueberry preserves soon.


They started ripening in late June, and look like they will continue for another week or so--that's pretty similar to my experience at the old place.  The four producing bushes are largely the same as what I had before, mostly rabbiteyes and of the same varieties that worked well at my former house (Climax, Tifblue, Powderblue).   I have enough for a load of blueberry preserves.


Saturday, June 27, 2020

Eastern Eyed Click Beetles


Until the last few years, I had never seen these things.  Then they occasionally showed up, usually dead in standing water.  A couple of summers ago, when I was having well issues, I had to run some water into stock tanks. 


 I wasn't living here then, and when I returned, I found a couple of strange and huge beetles floating on the surface.


This summer, I drew a bucket of water and the next morning found the same: another dead click beetle.  But I had never seen a living specimen, until a couple of weeks ago, when one flew onto the grille of my truck when I was standing nearby. Since then I've seen more--maybe I'm just more attuned to them now.


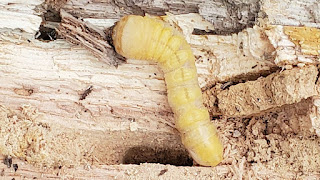
I haven't seen them click--the above is still the only live one I have seen up close; the others have been flying--but they otherwise seem to be pretty benign insects (and may even be beneficial, according to Michael Raupp of the University of Maryland Cooperative Extension Service).  They prey on larvae of other species, including those that burrow into decaying wood.  With my firewood stacks, I definitely see signs of infestation, sometimes severe.


Help dealing with creatures like this would be welcome.  Wood eating organisms may have their place, but are not a good fit for my oak firewood.